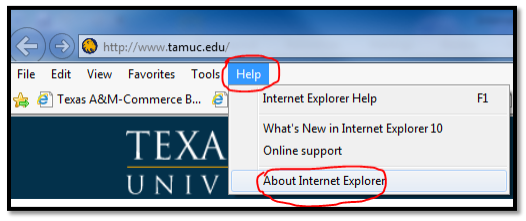
Accessing VPN using Internet EXplorer 10
Internet Explorer (IE) version 10 – Last Updated on 8/22/2013
Download PDF:
- Go to the following link: https://vpn.tamuc.edu/+CSCOE+/logon.html
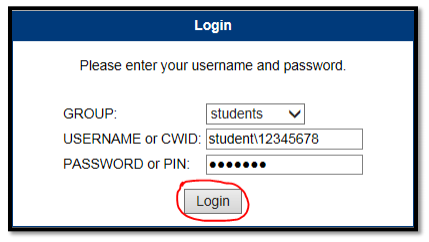
- On the following login page select students as the group. On username, enter student\ in front of your CWID. Next enter your myleo password. Click the Login button.
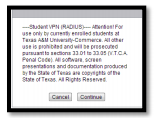
- Click continue
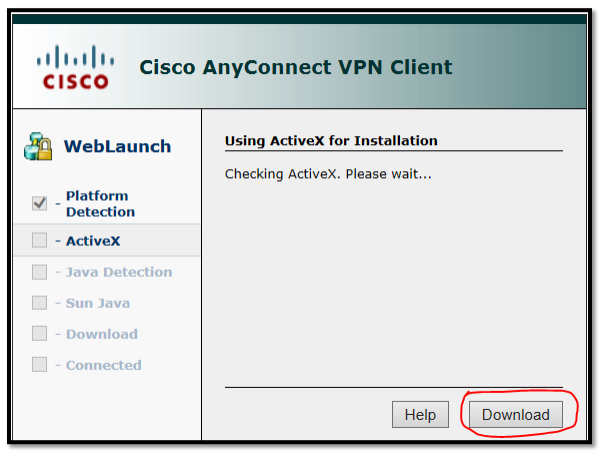
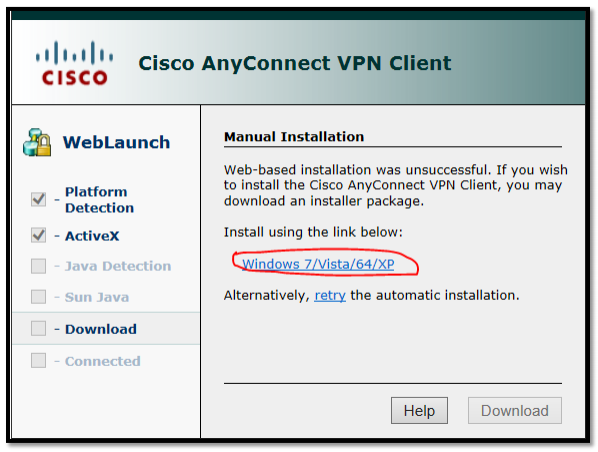
- If the window below appears, click on the Download button.
- When this window appears, click on the Windows 7/Vista/64/XP link to install manually.
- You will be prompted to Run the anyconnect file. You can find this prompt at the bottom of the IE webpage. Click the Run button.

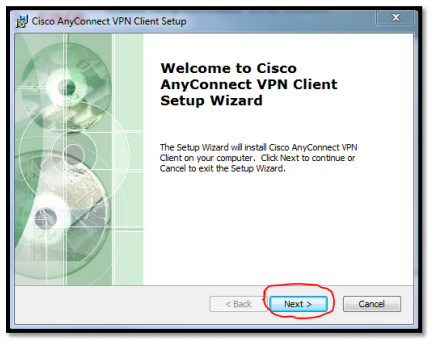
- When you see the Cisco AnyConnect VPN Client Setup Wizard click on the Next button.
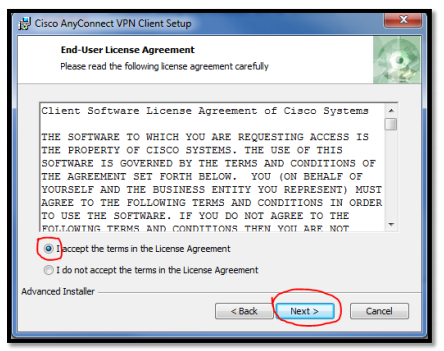
- Read the End-User License Agreement and then be sure to select the “I accept the terms in the License Agreement” radio-button. Then click the Next button.
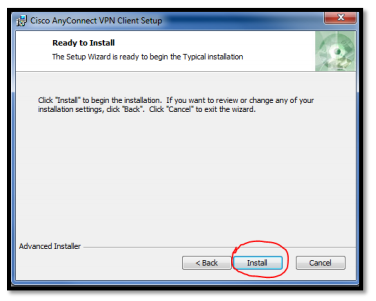
- Click on the Install button.
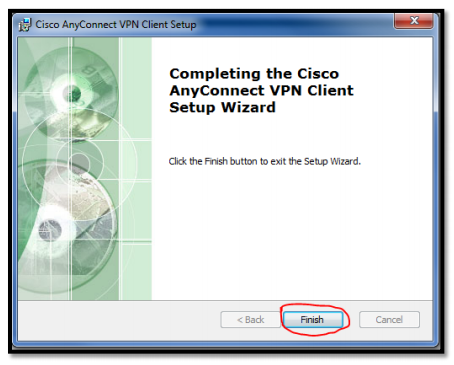
- Once the installation is complete click the Finish button.
PART TWO
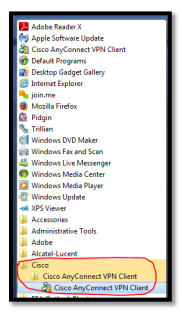
- Click on the Start menu located on your desktop, select All Programs and click on Cisco>>Cisco AnyConnect VPN Client>>Cisco AnyConnect VPN Client
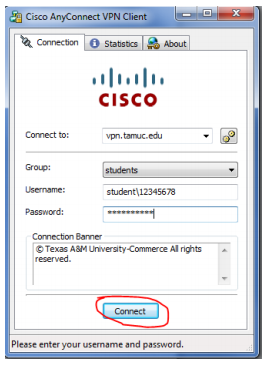
- The Cisco AnyConnect VPN Client pop-up window appears. Select the Group as Students. Enter student\ in front of your CWID in the Username field. Next enter your myleo password in the Password field. Click the Connect button.
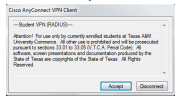
- Click the Accept button
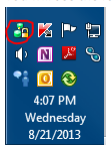
- Once you have successfully connected, the following icon should appear in your system tray. You will see the following icon when the VPN client is connected.
FAQs
- The VPN client is not accepting my password what do I do?
- Answer: Make sure you are entering in the CWID and password in the correct format and make sure you are including the student\ in username field. If you are sure you are entering the correct information in the correct format and are enrolled in the current term, please contact our office at 903-468-6000 to get your password reset.
- I am connected to the VPN client but now I am getting a different error message when trying to access the databases, it says something about cookies, what do I do now?
- Answer: Visit the Student Knowledge Base and look under the MISCELLANEOUS HELP section under Internet Browser Tips & Tricks. Click on the browser specific link for Setting Browser to Accept Cookies.
- I am still getting the same error message, what now?
- Answer: If you are still having problems, make sure you do not have any anti-virus, firewall programs, etc. that may interfere with your ability to connect to the library databases.
If are unable to log in to VPN please contact the help desk by calling 903-468-6000.