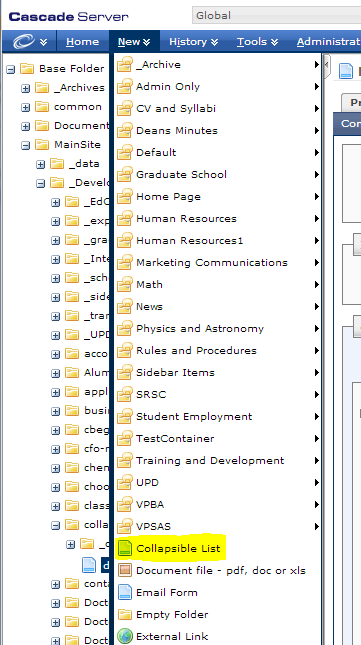
1. In Cascade CMS, navigate to “New > Collapsible List”
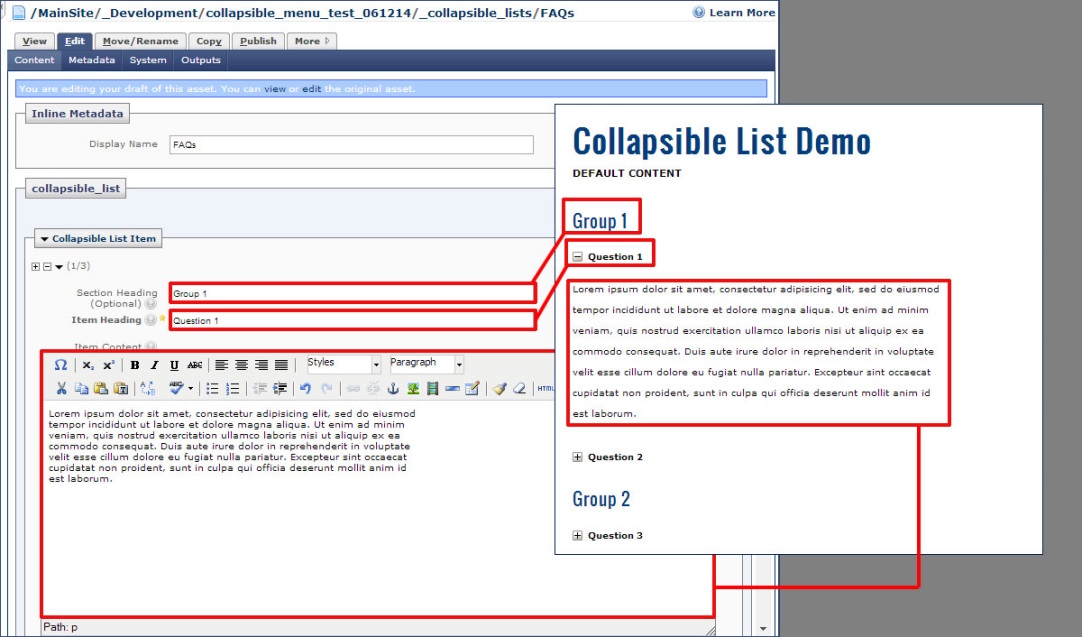
2. Give your Collapsible List a Display Name, place it in a Parent Folder, then create a Collapsible List Item. If you’d like this item to have its own Section Heading, you can fill in the Section Heading field. The Item Heading field is for the text you’d like the user to expand when they click it, and the Item Content text field is for the content which will be shown when the Item Heading is expanded. To add or remove Collapsible List items, simply click the [+] or [-] buttons on the top, left side. Click Submit.
Here is an illustration of how the text you insert into the fields will be displayed on the actual page.
Notice, the Section Heading becomes the larger, blue text on the page. The Item Heading becomes the smaller, dark blue text with the “plus” or “minus” next to it for expanding and collapsing. The WYSIWYG text becomes the main content that is viewed when the Item Heading is expanded.
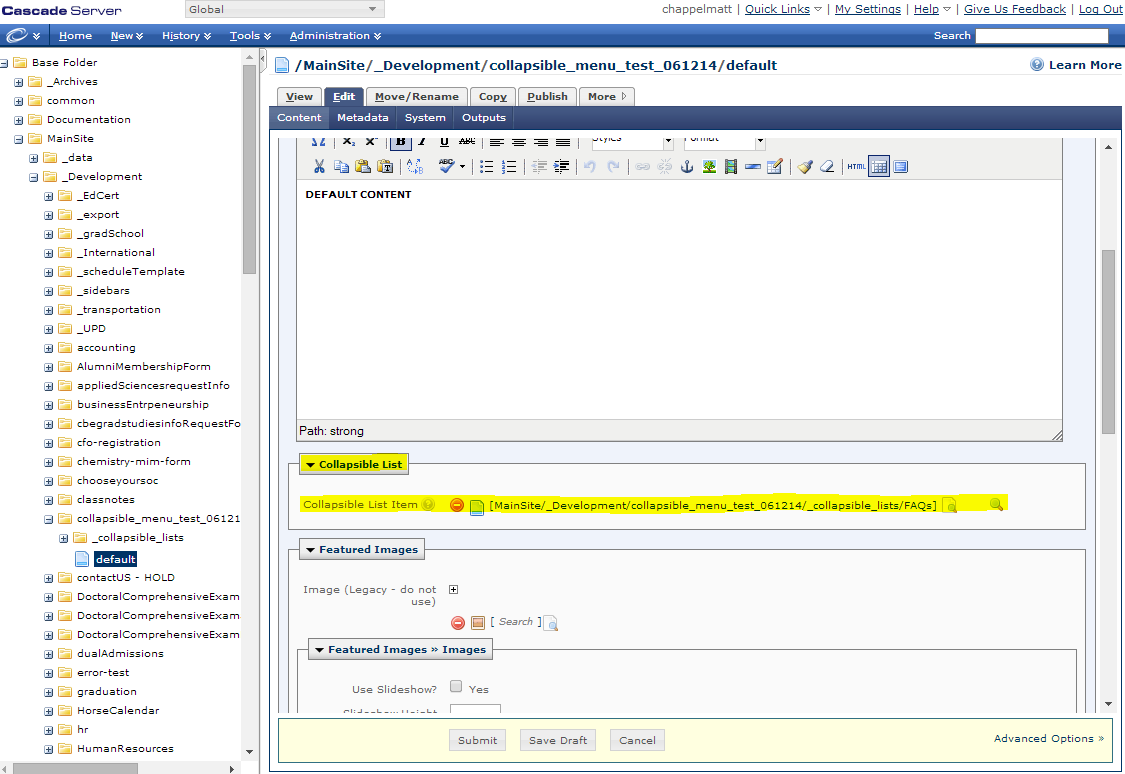
3. Once you’ve created your Collapsible List Item, it’s time to assign it to a page. Navigate to the page you’d like the Collapsible List to appear on, then scroll down to the Collapsible List Section. There, you will see a file chooser. Click the “browse” button and select the Collapsible List Item you just created. Click Submit.
4. You should now see a preview of your page with your Collapsible List Item included! Don’t forget to publish your page! Now, your new page with the Collapsible List Item is live.
![]()