In order to create new content for your site, you must understand the following three things:
1. You must begin the file creation from the “_COMMON” site.
2. Know which site you will be creating the file for.
3. You must have access to create files there. If you can navigate to the site, and edit files already there, then you have the correct access.
For example, let’s make a page in the CAMPUSLIFE site. We will begin by navigating to the _COMMON site, and creating a page for CAMPUSLIFE.
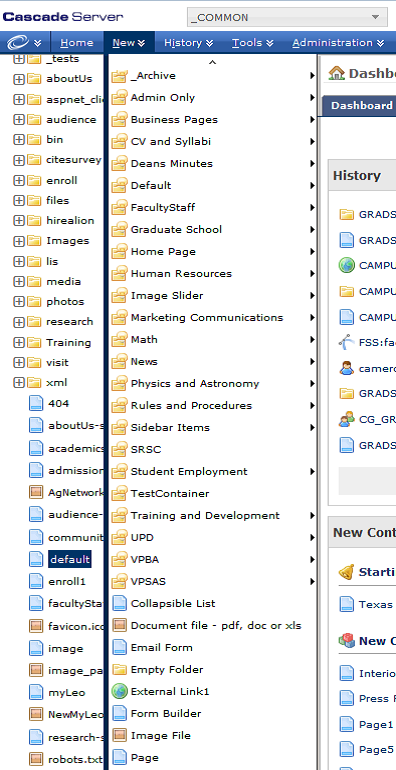
NEW-Will Provide all folders and assets
PREVIOUS-Will display limited options
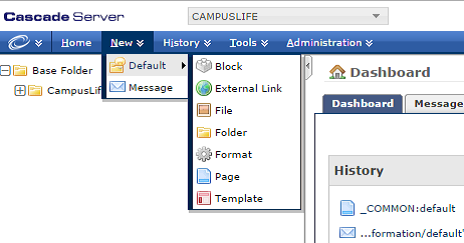
As you can see, while in the _COMMON site, you are able to see the appropriate items from the New menu. Scroll down to select the item you’re creating.
Now, we will make a regular page named Cascade Practice, in the site CAMPUSLIFE. Once you select page, you will see the following:
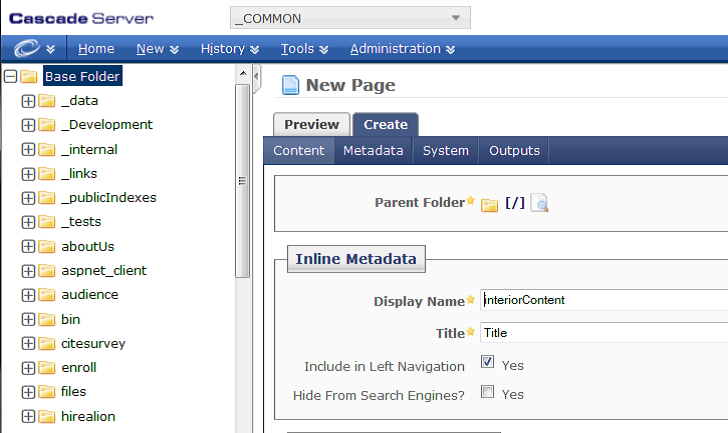
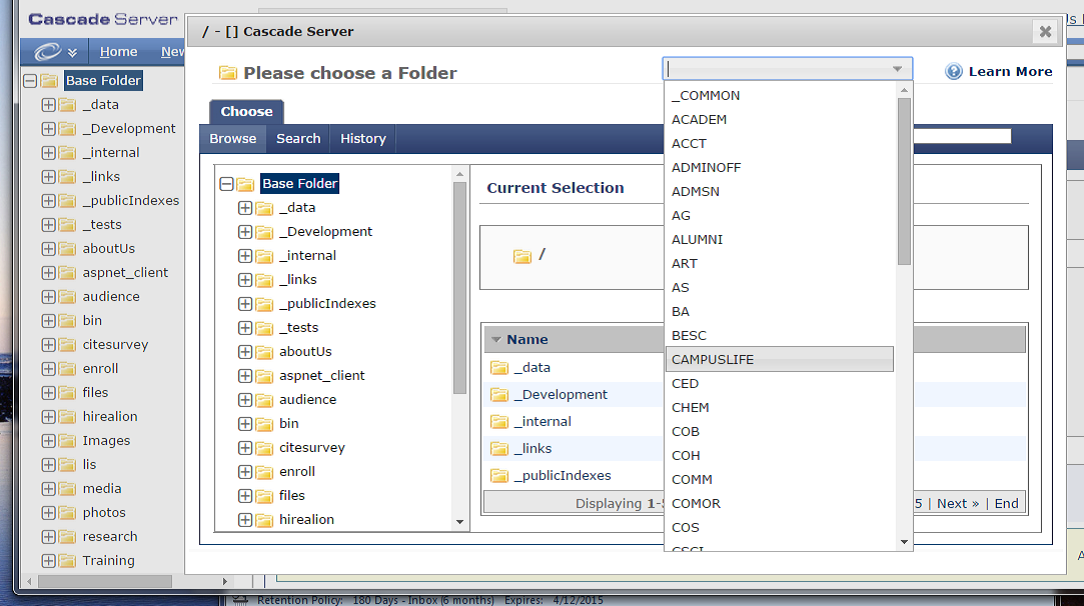
The parent folder needs be changed to CAMPUSLIFE and you need the name of the file. First, set the location where you’re creating the file by clicking on the Parent Folder icon and browse to your site.
Note: This step can also be selected when you have visited the page before creating the new page as the folder will show up as a history when browsing.
1. Click the section for Parent Folder so that you can select Browse.
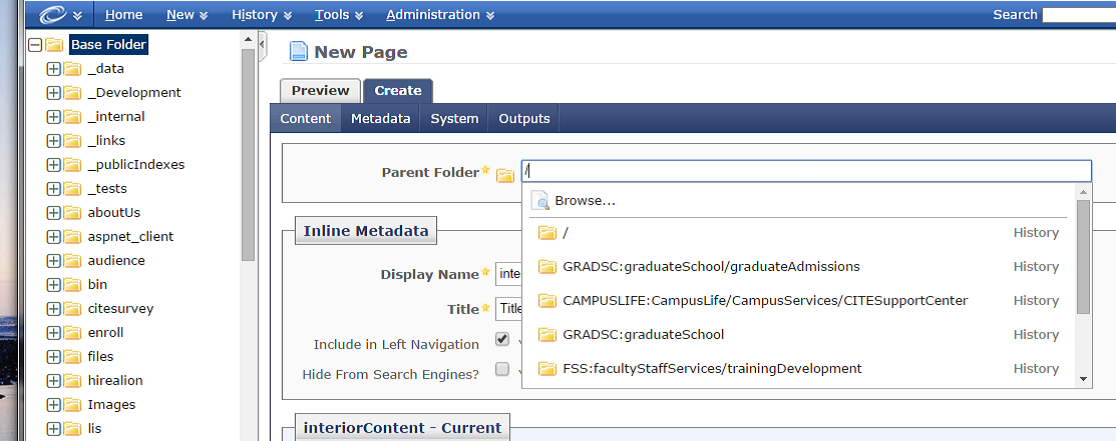
2. Set the site to your site, in our case it will be CAMPUSLIFE, and select the folder where you’re creating the item.
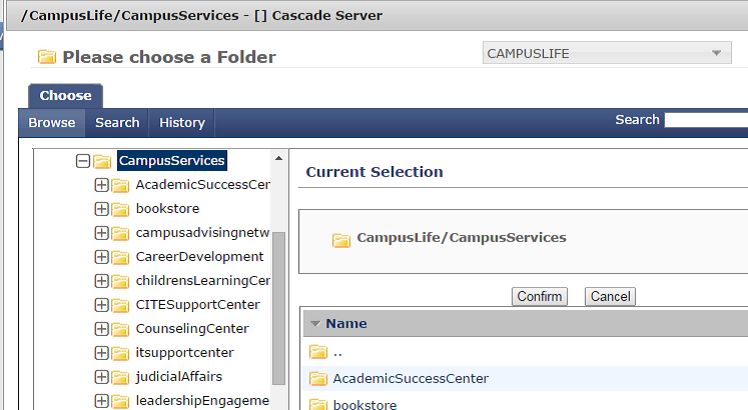
3. Shown below is the results of selecting CampusLife/Campus Services folder. Once you’re set, click confirm, so that you return back to your page creation.
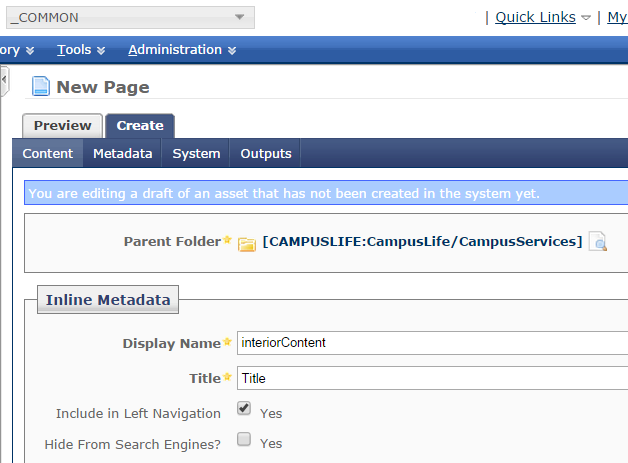
4. From here, began entering the information for the new page and submit. The new page will now be created in your site. For example, we will created CascadePractice.
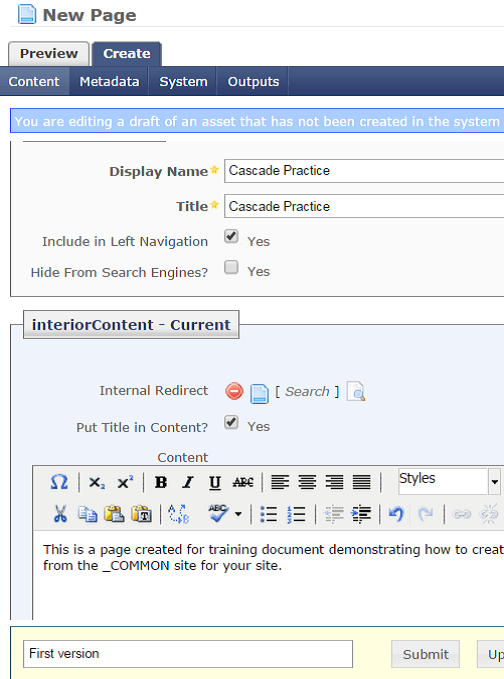
5. The page is now created. Publish it as you normally would, and now your page is created and published to the website.
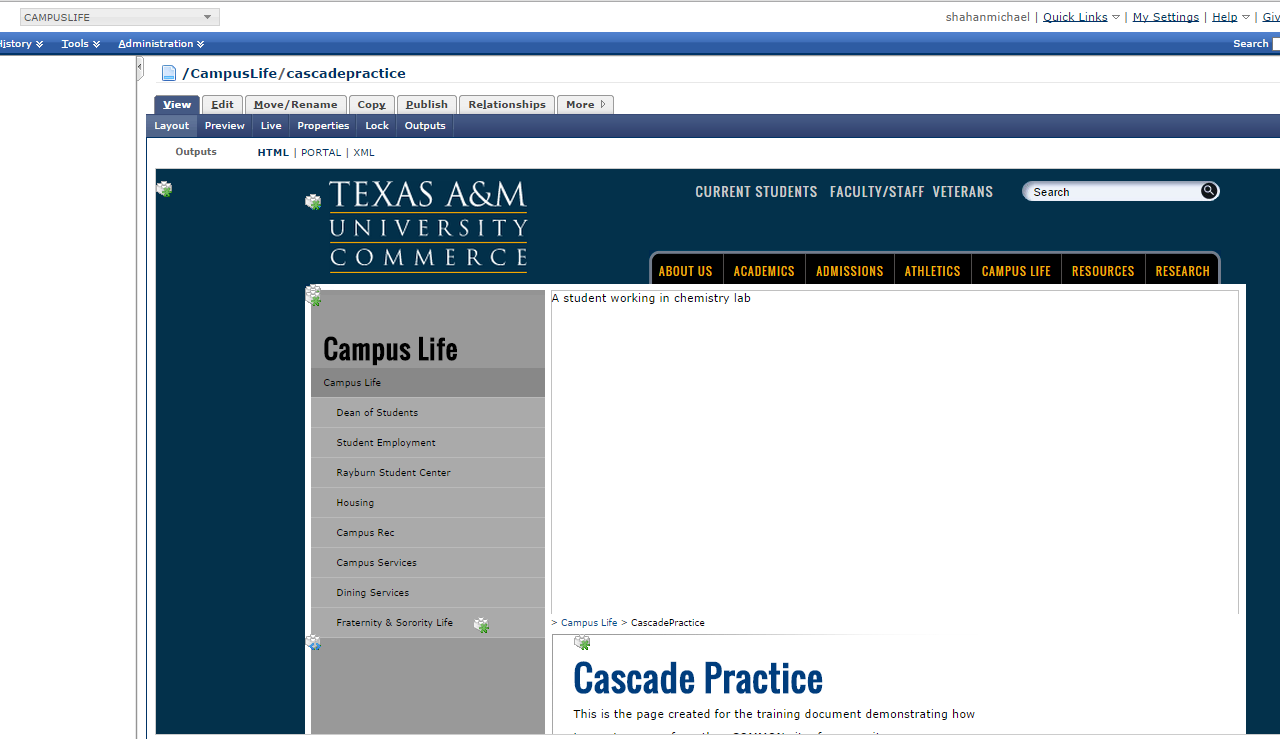
6. Page is now published.
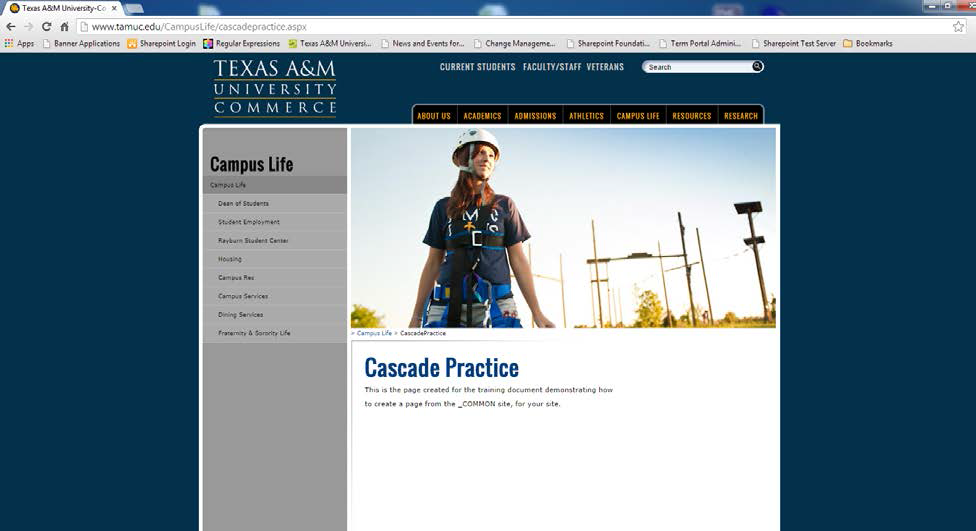
To request a change to this page or to request access to make changes yourself, email helpdesk@etamu.edu.

