The “Faculty/Staff Slider” component is built using the Flexslider JQuery toolkit and is a great way to turn plain Faculty/Staff information into an interactive, customizable slider for your web page. Below are instructions on how to use the component in Cascade CMS.
The first thing we want to do is set up the folder structure to house all of the different assets that work together to form the faculty/staff slider. The easiest way to create this folder structure and the necessary assets is to navigate to “New > FacultyStaff > Faculty Staff Slider Package”. This method auto-generates EVERYTHING you need to get a Faculty/Staff Slider up and running quickly!

Below is a breakdown of the folders and assets that are
included when you generate this package:
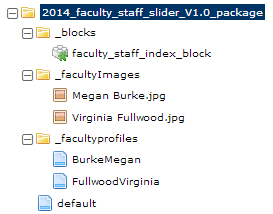
1.) “_blocks” folder:
This folder houses your faculty/staff index block. This block, when pointed to
a folder, will list each faculty profile page in that folder on a single page.
2.) “_facultyImages” folder:
This optional folder houses the images for your faculty profile pages, which
make up the faculty/staff slider.
3.) “_facultyProfiles” folder:
This folder houses your faculty profile pages, which make up the faculty/staff slider.
Again, by navigating to “New > FacultyStaff > Faculty Staff Slider Package”, you can auto-generate all the necessary
folders and assets to get started with your faculty/staff slider. However, if you ever need to create these assets
individually, here’s how:
The necessary faculty/staff slider assets are:
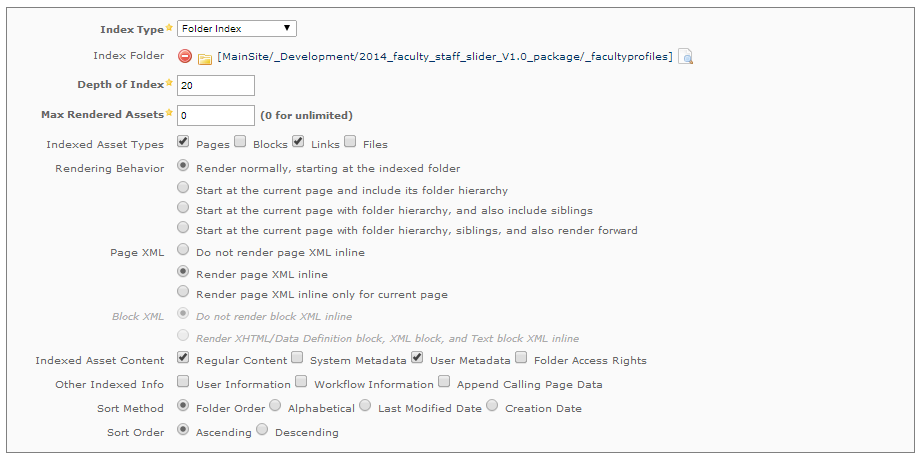
1.) The faculty/staff index block:
This index block transforms all the Faculty Profile Pages into slides. The settings for this index block are as follows:
Remember to set the “Index Folder” setting to point to your “_facultyprofiles” folder!
2.) Faculty/Staff Images:
These are the photos(160x240px) for your Faculty/Staff Slider. These photos can be located wherever you like, but we recommend storing them in your “_facultyImages” folder for better organization. To upload a photo, make a copy of the existing image “Megan Burke.jpg” or “Virginia Fullwood.jpg” then click on Edit > Choose File. When you are done uploading the photo, click on “Move/Rename” and change the system name.
3.) Faculty/Staff Profiles:
You can create Faculty/Staff Profiles for each faculty/staff member you want featured in your slider. These profiles should be housed in the “_facultyprofiles” folder. Below is an example of a Faculty/Staff Profile with the Faculty/Staff info filled out:
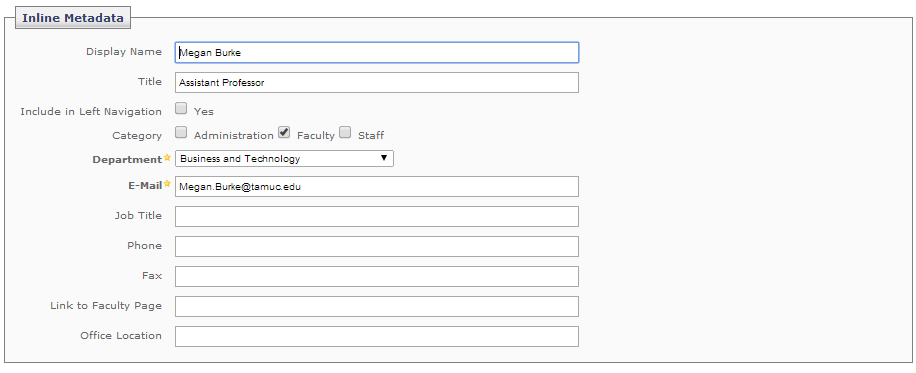
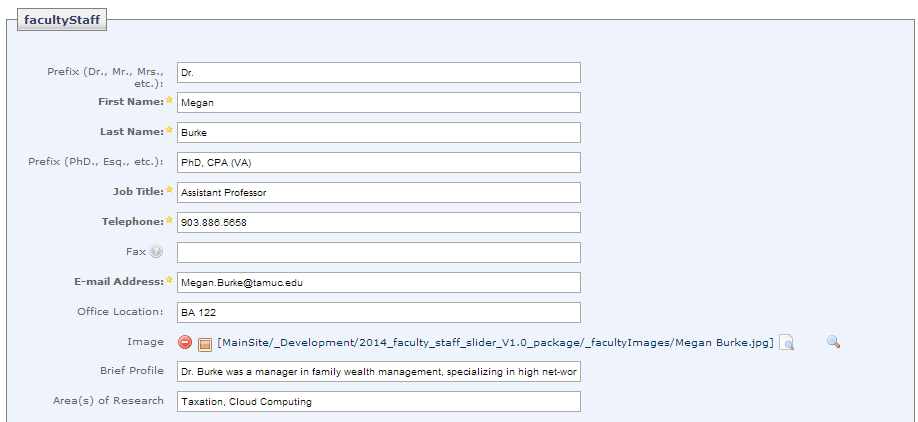
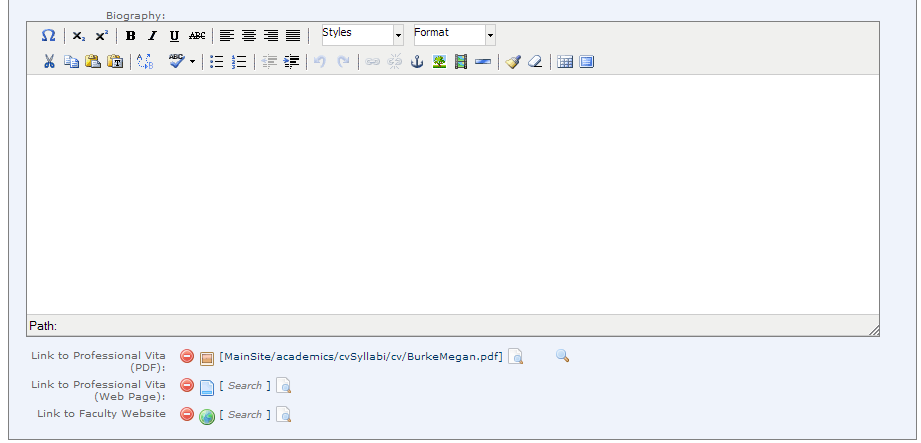
You will notice a large text area for a biography and an area for uploading a vita in either PDF, or webpage format. Make sure you provide the “Link to Professional Vita (PDF/Web page)”. There’s also an area to link to a faculty webpage.
4.) Display your Faculty/Staff Slider on a page:
To get your Faculty/Staff slider to display on a page, navigate to the page you’d like to display the slider on, then click “Edit”. Scroll down to the “Faculty/Staff Slider Block” area, the select your Faculty/Staff Index Block. Click “Submit” to save the page.

View Your imageSlider on a Page
Once you save your page, you should immediately see your new Faculty/Staff Slider on the page preview. If you don’t, please go back through the steps and ensure you didn’t miss anything. Don’t forget to publish your Slider Page!

![]()