Insert & Edit Text
Editing a page in CMS is very similar to editing a Microsoft Word® document.
- Start by locating the page and click on the page you have rights to edit. For this example we are editing the pages /MainSite/studentLife/campusServices/ITSupportCenter/default
- Once the page has loaded, click on the Edit tab located above the page next to the active View tab.
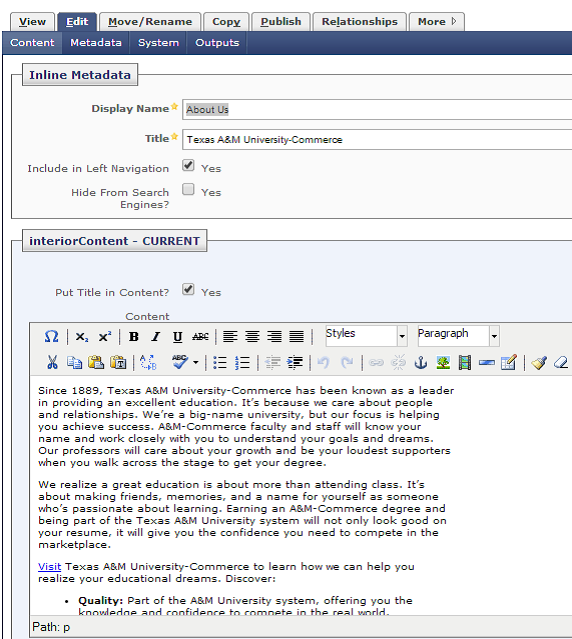
- From here you are able to edit all the content within the Interior Content - Current window. Make the desired changed to the document just as you would when using a standard word processor. While you are editing an asset, such as a page, file, or folder, the asset is automatically locked to prevent other users from accessing the same asset while it is being edited. When edits have been made and the asset has been submitted, the asset is automatically unlocked so that other users can access it.
Format
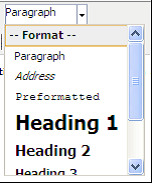
- Place the text cursor anywhere within a paragraph and change the format Menu setting to Heading 1,2 or 3, Paragraph, etc.
- To save the edits, click the Submit button at the bottom of the screen. After the workflow process, the screen will return to the view of the page as it will appear in a browser. Note that the formatting of the text may not appear exactly as it did in the editor.
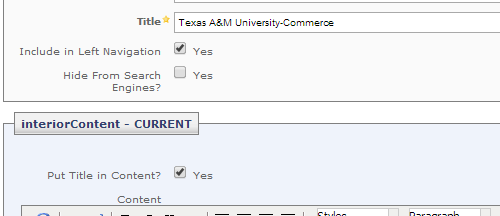
- Another way to set the title of the page to heading 1 is by checking the “put in title in content ” box and title will appear as heading 1 on the top of the page.
- Remember that every page must have a heading 1 for accessibility of screen readers.
- If you prefer to edit the HTML, choose the HTML button on the WYSIWYG toolbar to open the HTML Source Editor window. You can edit your HTML directly in that window, or copy and paste the HTML to your desired editor and then back into the Cascade HTML editor when you are finished. Choose the Update button to apply your changes to the page and then the Submit button to save your page to Cascade.
Using the Word Processor
The word processor, also called the WYSIWYG (what you see is what you get) editor, that is integrated in the CMS system has the same functionality and features you are most likely accustomed to using in a standard editor. The button functions are as follows: 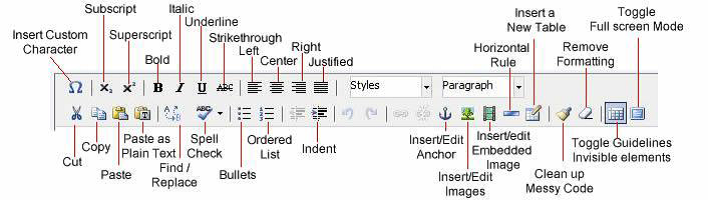
Try out some of the different toolbar buttons in the word processor in order to become more acquainted with how they work.