Sidebar - Image
Image sidebars simply show an image which can be linked to any page on the web. They do not have the standard format of the standard sidebar (no heading).
Note: The image you want to use for your sidebar must already be loaded into Cascade and the item you want to link to must also be in cascade (If you want to link to an external web page, you must have pre-created an External Link Asset to that page.)
To create an Image Sidebar:
- Browse to and select your _sidebars folder to where your Image side bar will be stored
- In the menu bar, click New > Sidebar Items > Image
- The following screen will be displayed:
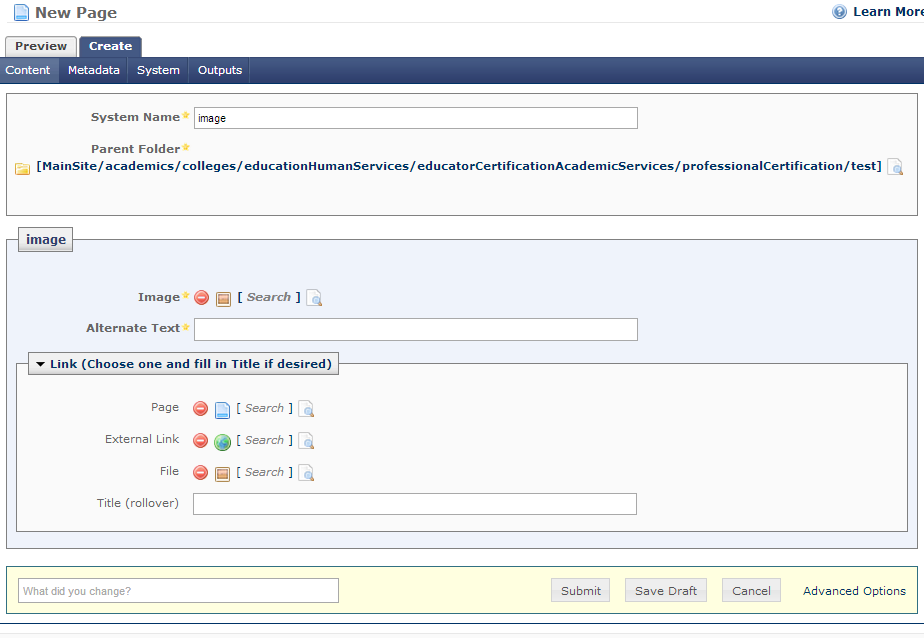
- In the System Name field, enter a descriptive name for your sidebar item
- Search for the image by selecting the Browse icon to display the asset chooser window and browse to the image you want then click the confirm button.
- In the Alternate Text field, enter a description of the image Note: if the image contains text, the Alternate Text field must contain the exact text within the image – this is required by Sec 508 Web Accessibility.
- Depending on whether you want the image to link to a Page, External Link Asset or File, select the appropriate browse icon to display the Asset Chooser Window then browse to that asset and select the Confirm button.
- Optional – In the Title(rollover) enter a text that will pop up when the mouse is rolled over the image.